Hi there! I realize I have been VERY absent lately...gotta get back into the swing of things!
I decided I am going to title my posts as Pickle Posts and number them. It helps me see how far I have come and it helps to simplify my post titles. :)
So let's start with BLESSINGS. I love those! Since last week, I found out I won won won - all over the place! LOL!
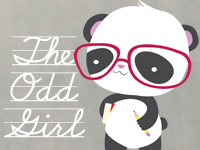
Let me start with last week - I was named a Fav for this Some Odd Girl Challenge for my card featuring cutie little Mooey! Talk about THRILLED...THUD! Pick me up off the floor! What an honor!
I also got my new Chibi - yeppers, that's a caricature of ME created by Kristy at Some Odd Girl! How many ways can I say LOVE?! :)
Then I won a couple more things - the Gnomies stamp set from a brand new company, Sweet Stamp Shop and a fabulous prize pack from SRM Stickers & Bazzill Paper. Talk about WOW...
On Monday, I won prizes for Sketch 'N Stash Challenge# 67, The Greeting Farm Blog Hop AND Sparkle Creations Blog Hop.
SERIOUSLY ... ARE YOU KIDDING ME?! I told Hubby we better go stock up on some lottery tickets LOL!
Now, on to birthdays - August has lots of family birthdays. My family is my biggest blessing! There was a big family birthday party last Saturday and I was burning the midnight oil making cards. Masculine cards aren't my forte' cuz I like cute and blingy stuff. You can't create those for the men in your life - well, Hubby appreciates those, but that's a different story! I thought I would share what I created - nothing fancy but they were created with lots of love!
Dad's Card 'You're A Classic':
For Dad's card, I kept it simple and classic! I stuck with grays, blues and reds in my color scheme and kraft as my base. This cool cat is colored with Copics, the Nesties label and tag are distressed with Weathered Wood Distress Ink and the sentiment is just typed in typewriter font (LOVE) from my computer. I finished it off with red satin ribbon and nailheads to embellish the card. Inside it says - 'Nope, not old...just a classic! Happy Birthday!' :) I love you, Dad!
My Nephew's Card 'Worm Birthday Wishes':
For Shea's card - I wanted to keep it simple and funny. How hard is it to create something for a 14 year old boy? So I pulled out my fave Paper Smooches stamps and paper pieced a simple scene with this cute worm. (My SIL thought it was a pickle LOL!) This patterned paper from My Mind's Eye was perfect - I love their Lime Twist collection! Inside there is a money pocket stamped with 'Celebrate with a few bucks for you!' Paper Smooches has so many options for mixing and matching sentiments between stamp sets - GOTTA LOVE THAT. The thing that made me so happy about this card was my nephew told me he normally hates cards (most teenagers think they are pretty pointless - they want the gifts), but he loved this card so much that he was going to keep it. Talk about making his auntie smile! That was MY gift for the day! :) I love you, Shea!
One thing I want to mention is my nephew Shea is an identical twin - his sweet twin brother Trevor passed away when he was 6 from an unexpected, sudden and very cruel illness. Our family has been blessed with few tragedies, but this was heart breaking and so very difficult for us as you can imagine. I keep that sweet happy little boy in my heart and remember him often, especially when I am around Shea, his mirror image. I love you and miss your smile, Trevor!
Stuff I Used:
Dad's Card -
Image - Pink Cat Studio 'Cool Cat' Digi
Paper - AMuse Studio Sugar & Blueberry, Gina K Kraft
Nesties Dies - Labels 18, Ribbon Tags Trio
Copics: C0, C1, C3, C5, C7, C9, 100, R12, R39 Ink: Weathered Wood Distress Ink
Other Stuff - Nailheads, Ellen Hutson Red Satin Ribbon
Shea's Card -
Stamps: Paper Smooches ' Birthday Buddies', 'Sentiment Sampler' & 'Santa Paws'
Paper - AMuse Studio Sugar & Grass, Gina K Kraft, My Mind's Eye Lime Twist 'Fly a Kite' 6x6 Paper Pad
Copics - Party hat B28, R27, G05 Ink - Memento Tuxedo Black
Other Stuff - Bazzill 'Worth Remembering' Adhesive Pearls
Thank you for stopping by today - it makes me happy to know you are out there supporting me!
Holy cow...a thank you card and a few challenges too
Hi there!
I hope you had a wonderful weekend! Hubby and I hit IKEA to get some more storage for my craft room. Pretty soon I will have shelves lining the walls...I HAVE TOO MUCH STASH LOL! I still have more cleaning to do and another craft cube to put together but it's looking pretty good!
I did find some fun time to craft and create. It's far too hot and humid to do anything but stay in the nice cool house under a ceiling fan! I got some new stamps from Some Odd Girl that were begging me to ink them up - I LOVE THEM!
The current SOG challenge - Thank You Cards. You can never have enough of these, can you? I am a lover of all things bovine (organic and grass fed, of course), so when I saw super cute Mooey, I was inspired! Here is my thank you card - in Spanish! OLE'- LOL! (Must be the Latin influence from doing all of that Zumba...)
My 'Moo-chas Gracias' Card:
Mooey takes center pasture here! His spots are paper pieced with black & white polka dot paper and he is 'white-lighted' and colored with Copics. I embossed the polka dot paper with white embossing powder so I could fussy cut him out and I used a white Sharpie poster pen to give him some detail here and there. His eyes are dotted with black Enamel Accents.
He is popped up with dimensional adhesive on a circle embossed with polka dots. The sentiment is part stamping, part tiny ABC stickers. I decided to create a tri-fold card with a navy ribbon tie. I made it more 'country' with the red mat & blue gingham paper. I kept the overall design pretty simple. I haven't finished the inside of the card yet, but it will say something cow related - like 'you're the head of the herd'...or 'you're the cream of the crop'. :)
I am also entering this into these challenges:
The Paper Variety - Circles
Sketch N Stash Challenge 67
Stuff I Used:
Stamps - Some Odd Girl 'Mooey'
Cardstock - AMuse Studio - Sugar, Blueberry Gingham, Black/White Polka Dots / Stampin' Up Real Red
Copics - C00, C1, R01
Nesties - Circles, Scalloped Circles
Other Stuff - AMuse Studio Dots Embossing Plate, Navy Blue Ribbon (my random stash), Cosmo Cricket Tiny Type ABCs, Black Enamel Accents, Stampin' Up Dimensionals
Moo-chas gracias for stopping by today! :) I hope you are moo-ved to leave some love too.
Paper Smooches SPARKS Challenge
Hi again...it looks a Pickle Posts world record cuz I was slackin' before LOL!
I think all of this Zumba has made me hyper... :) And I have personal training this morning and salsa dancing tonight, so I gotta HURRY to create this post.
It's NO secret that I LOVE love LOVE Paper Smooches! The neighbors can hear me shriek with each new release LOL! While I REALLY wanted to create more cards for this challenge, I just ran out of time. So I started this card. The creative juices just weren't flowing... then I was doing laundry Sunday and it all came together in my head. Does that ever happen to you? Completely blank mind and finally a creative idea pops in there! Happens to me all the time LOL...anyway, back to the challenge and my card!
We needed to use certain colors or a sketch for this challenge. I actually used a color scheme from last week's Colour Q challenge for this (again mojo didn't make the deadline) but I used this sketch as my inspiration.
My 'Way to Go Gill-Friend' Card:
I created this card to congratulate one of my good friends who just got a new job (yay Linda!). I stamped and fussy cut the pelican, that cute little fish and wood pylons and popped them up with dimensional adhesive. The pelican is colored with Copics. I die cut the waves and the scalloped ocean bottom and layered them on my card front. The stars are actually striped canvas stars that I painted over with Gelatos - LOVE THOSE THINGS! After that dried, I painted Iridescent Medium over the top for pearly shine, hole punched them and added bakers twine to dangle them in the water. Of course, Cutie Fish needed some bling so I gave her fins some Star Dust Stickle shine!
Stuff I Used:
Stamps: Paper Smooches 'Surf and Turf' & 'Sentiment Sampler'
Cardstock: AMuse Studio Sugar, Sky, Ocean, Watermelon, Latte, French Roast
MFT Die-Namics: Catch a Wave, Small Scallop Border
Copics: C1, C3, Y17, Y19, YR07, YR09
Embellishments & Bling: Jillibean Soup White Stripes Canvas Stars, Faber Castell Metallic Peach & Turquoise Gelatos, Brown & White Bakers Twine, Iridescent Medium, Star Dust Stickles, 3-D Dimensional Adhesive
Ink: Memento Tuxedo Black & Rich Cocoa
Wish me luck! Thanks for stopping by - your comments make my day!
I think all of this Zumba has made me hyper... :) And I have personal training this morning and salsa dancing tonight, so I gotta HURRY to create this post.
It's NO secret that I LOVE love LOVE Paper Smooches! The neighbors can hear me shriek with each new release LOL! While I REALLY wanted to create more cards for this challenge, I just ran out of time. So I started this card. The creative juices just weren't flowing... then I was doing laundry Sunday and it all came together in my head. Does that ever happen to you? Completely blank mind and finally a creative idea pops in there! Happens to me all the time LOL...anyway, back to the challenge and my card!
We needed to use certain colors or a sketch for this challenge. I actually used a color scheme from last week's Colour Q challenge for this (again mojo didn't make the deadline) but I used this sketch as my inspiration.
My 'Way to Go Gill-Friend' Card:
I created this card to congratulate one of my good friends who just got a new job (yay Linda!). I stamped and fussy cut the pelican, that cute little fish and wood pylons and popped them up with dimensional adhesive. The pelican is colored with Copics. I die cut the waves and the scalloped ocean bottom and layered them on my card front. The stars are actually striped canvas stars that I painted over with Gelatos - LOVE THOSE THINGS! After that dried, I painted Iridescent Medium over the top for pearly shine, hole punched them and added bakers twine to dangle them in the water. Of course, Cutie Fish needed some bling so I gave her fins some Star Dust Stickle shine!
![]() |
A close up view to see the bling! |
![]() | |||
Isn't this pelican adorable? Makes me smile every time I see him... |
Stamps: Paper Smooches 'Surf and Turf' & 'Sentiment Sampler'
Cardstock: AMuse Studio Sugar, Sky, Ocean, Watermelon, Latte, French Roast
MFT Die-Namics: Catch a Wave, Small Scallop Border
Copics: C1, C3, Y17, Y19, YR07, YR09
Embellishments & Bling: Jillibean Soup White Stripes Canvas Stars, Faber Castell Metallic Peach & Turquoise Gelatos, Brown & White Bakers Twine, Iridescent Medium, Star Dust Stickles, 3-D Dimensional Adhesive
Ink: Memento Tuxedo Black & Rich Cocoa
Wish me luck! Thanks for stopping by - your comments make my day!
AMuse Studio Blog Hop
Hi there! Welcome to the AMuse Studio blog hop!
If you aren't familiar with AMuse Studio, think clean and simple! AMuse Studio has such a wonderful variety of stamps and all of the yummy stuff to go along with them! Every month there is a Spotlight Sale where you can save an extra 10% on selected stamps and a color coordinated cardstock pack. The current sale runs from July 15 - August 15. You can find all the details at my AMuse web store.
Click on the AMuse badges in my sidebar to download our current catalog or to shop at my web store. Our fabulous brand spankin' new Holiday Catalog is also available to you. Just e-mail me to request a PDF copy sent to your e-mail.
** If you place an order in my web store by August 16, you will be entered into a drawing to get some extra goodies from me! **
This month's theme is 'What Summer Means To Me'. Well, living in Arizona, that's EASY. Lots and LOTS of sunshine and long hot days! Since we have so much of it, I thought I would send some your way!
My "Sunshine" Card:
This bright and cheery card just makes me smile - I LOVE orange, yellow and turquoise! The sun was stamped with Orange ink onto Buttercup CS and circle punched. I used my tiny polka dot stamp with Bermuda ink on Ocean CS and stamped the clouds on top, then I fussy cut them out. I wanted a fun 'sky' background, so enter more Bermuda ink on a mesh background stamp. The mat behind the scene is Buttercup CS stamped with larger polka dots in Buttercup ink - I do love my polka dots! Add the sentiment, orange satin ribbon and pearls colored with Copics to match that gorgeous Ocean blue and voila! a CAS summer card!
I love vibrant spring flowers, but in Arizona, only very hardy plants, desert and cactus flowers survive in our summer heat. So I created my second card - a colorful floral card - to remind me of cooler days ahead!
My 'No One Like You' Card:
The marigolds were stamped with various AMuse inks onto Sugar CS and embossed with Satin Pearl embossing powder. I used Spellbinders dies to cut out the floral panel and the oval tag for the sentiment. Grass Gingham paper and Buttercup CS were used to mat the floral panel. The Buttercup CS was embossed using the medium dots embossing plate. I inked the tag edge with Buttercup ink and matted it on a Grass CS scalloped oval. The finishing touches - clear tiny Twinkle rhinestones embellish the flowers and sentiment tag and a border of Sugar polka dot ribbon.
Stuff I Used (All products are from AMuse Studio):
Card #1 -
Stamps: Sunshine and Shade, Polka Dot Patterns, Make a Scene, Mesh Background
Cardstock: Sugar, Buttercup, Ocean
Ink: Orange, Bermuda, Buttercup pigment inks, Memento Tuxedo Black ink
Embellishments: Orange Satin Ribbon, Creative Candy Pretty Pearls (colored with Copic marker BG05)
Card #2-
Stamps: Marvelous Marigolds
Cardstock: Sugar, Buttercup, Grass Gingham
Ink: Buttercup, Bubblegum, Orange, Heather, Ocean pigment inks, Memento Tuxedo Black ink
Dies: Spellbinders Labels 8, Ovals, Scalloped Ovals / Medium Dots Embossing Plate
Embellishments: Satin Pearl Embossing Powder, Sugar Polka Dot Ribbon, Creative Candy Twinkle Stickers (rhinestones)
If you are hopping along today, you should have arrived from Dana Vincent's blog.
Your next stop will be Carissa Fulkerson's blog.
Thank you so much for stopping by and hopping with us today!
If you aren't familiar with AMuse Studio, think clean and simple! AMuse Studio has such a wonderful variety of stamps and all of the yummy stuff to go along with them! Every month there is a Spotlight Sale where you can save an extra 10% on selected stamps and a color coordinated cardstock pack. The current sale runs from July 15 - August 15. You can find all the details at my AMuse web store.
Click on the AMuse badges in my sidebar to download our current catalog or to shop at my web store. Our fabulous brand spankin' new Holiday Catalog is also available to you. Just e-mail me to request a PDF copy sent to your e-mail.
** If you place an order in my web store by August 16, you will be entered into a drawing to get some extra goodies from me! **
This month's theme is 'What Summer Means To Me'. Well, living in Arizona, that's EASY. Lots and LOTS of sunshine and long hot days! Since we have so much of it, I thought I would send some your way!
My "Sunshine" Card:
This bright and cheery card just makes me smile - I LOVE orange, yellow and turquoise! The sun was stamped with Orange ink onto Buttercup CS and circle punched. I used my tiny polka dot stamp with Bermuda ink on Ocean CS and stamped the clouds on top, then I fussy cut them out. I wanted a fun 'sky' background, so enter more Bermuda ink on a mesh background stamp. The mat behind the scene is Buttercup CS stamped with larger polka dots in Buttercup ink - I do love my polka dots! Add the sentiment, orange satin ribbon and pearls colored with Copics to match that gorgeous Ocean blue and voila! a CAS summer card!
![]() |
A close up view of all the details. |
I love vibrant spring flowers, but in Arizona, only very hardy plants, desert and cactus flowers survive in our summer heat. So I created my second card - a colorful floral card - to remind me of cooler days ahead!
My 'No One Like You' Card:
The marigolds were stamped with various AMuse inks onto Sugar CS and embossed with Satin Pearl embossing powder. I used Spellbinders dies to cut out the floral panel and the oval tag for the sentiment. Grass Gingham paper and Buttercup CS were used to mat the floral panel. The Buttercup CS was embossed using the medium dots embossing plate. I inked the tag edge with Buttercup ink and matted it on a Grass CS scalloped oval. The finishing touches - clear tiny Twinkle rhinestones embellish the flowers and sentiment tag and a border of Sugar polka dot ribbon.
![]() |
A close up view to see the pearl embossing and Twinkle rhinestones. |
Stuff I Used (All products are from AMuse Studio):
Card #1 -
Stamps: Sunshine and Shade, Polka Dot Patterns, Make a Scene, Mesh Background
Cardstock: Sugar, Buttercup, Ocean
Ink: Orange, Bermuda, Buttercup pigment inks, Memento Tuxedo Black ink
Embellishments: Orange Satin Ribbon, Creative Candy Pretty Pearls (colored with Copic marker BG05)
Card #2-
Stamps: Marvelous Marigolds
Cardstock: Sugar, Buttercup, Grass Gingham
Ink: Buttercup, Bubblegum, Orange, Heather, Ocean pigment inks, Memento Tuxedo Black ink
Dies: Spellbinders Labels 8, Ovals, Scalloped Ovals / Medium Dots Embossing Plate
Embellishments: Satin Pearl Embossing Powder, Sugar Polka Dot Ribbon, Creative Candy Twinkle Stickers (rhinestones)
If you are hopping along today, you should have arrived from Dana Vincent's blog.
Your next stop will be Carissa Fulkerson's blog.
Thank you so much for stopping by and hopping with us today!
My crazy life ... and a look at my Heart Journal
Hi there.
Just another busy week in the Pickle household! I started 3 new Zumba classes and a salsa dancing class with Hubby. SO MUCH FUN. However, tweaking my schedule and adding that to everything else on my plate - well, let's just say I am forever running. :) Always living La Vida Loca LOL!
I am working on some FUN stuff for the week. I will have more crafty pickleiciousness posted in the next few days! Stay tuned...
Now onto my artsy fartsy journal! Art journals are all the rage right now and The Greeting Farm offered a free He-Art Journal class.
Since I don't have enough to do - I signed up! :) Every week for 23 weeks, we have an assignment based on our artistic interpretation of a theme. Last week, the theme was "Spread Your Wings". We were also encouraged to step outside of our creative box - if we are neat crafters (yep, that's me), we should do something messy. So I decided to fingerpaint. Like a kid in kindergarten. :) What's messier than fingerpaint? Not much, I say. What's more fun than fingerpaint? Cleaning up, I say LOL! Here is what I created.
Week #1 - Spread Your Wings:
I started out with the 'Beautiful Fairy' digi from Karber Stamps. She looked dreamy and thoughtful. Perfect for what I wanted to do with these journal pages. I wanted to color her with darker colors to remind me of night. I used my Copics and added some fairy bling to her wings, wand and eyeshadow. I embossed my sentiments and dreamy swirls with white embossing powder so they would show in the midst of the kaleidoscope of color. I used Gelatos (paint in a chapstick tube - FABULOUS!) to scribble color onto my paper and then dipped my finger in water and smeared it. Serious fun! When I was done, I kept thinking of Joseph and the Technicolor Dream Coat LOL! For the finishing touch, I covered the pages with Iridescent Medium to give them pearly shine (so hard to see in the pictures, darn it).
Stuff I Used:
Stamps- Karber Stamps - 'Beautiful Fairy' Digi, Layers of Color - 'Joyful Noise' Stamps (large swirls & large butterfly), AMuse Studio Stamps - 'Ornate Elements' (smaller swirls), Marvelous Marigolds (small butterfly), Inkadinkado Stamps - Chelsea Alphabet (fly), Friendship (believe), The Rubber Cafe Stamps -'Vintage Treasures' (Do you ever sit and dream?), Stampin' Up Stamps - 'Bliss' (bird, small butterfly w/text)
Cardstock - AMuse Studio Sugar CS
Copics - Skin: E000, E00, E11, R20 / Hair: C1, C3, C5, C7 / Dress: BG01 bridged w/ BG05, BG07
Wings: RV10, R85, BG000, BG02 / Wand: 100, BG10
Faber Castell Gelatos - Every color in the rainbow and white
Nesties - Scalloped Ovals
Other Stuff - Versamark Ink, SU White Embossing Powder, Stardust Stickles, Iridescent Medium
Thanks for stopping by to take a peek! You make my day! :)
Just another busy week in the Pickle household! I started 3 new Zumba classes and a salsa dancing class with Hubby. SO MUCH FUN. However, tweaking my schedule and adding that to everything else on my plate - well, let's just say I am forever running. :) Always living La Vida Loca LOL!
I am working on some FUN stuff for the week. I will have more crafty pickleiciousness posted in the next few days! Stay tuned...
Now onto my artsy fartsy journal! Art journals are all the rage right now and The Greeting Farm offered a free He-Art Journal class.
Since I don't have enough to do - I signed up! :) Every week for 23 weeks, we have an assignment based on our artistic interpretation of a theme. Last week, the theme was "Spread Your Wings". We were also encouraged to step outside of our creative box - if we are neat crafters (yep, that's me), we should do something messy. So I decided to fingerpaint. Like a kid in kindergarten. :) What's messier than fingerpaint? Not much, I say. What's more fun than fingerpaint? Cleaning up, I say LOL! Here is what I created.
Week #1 - Spread Your Wings:
I started out with the 'Beautiful Fairy' digi from Karber Stamps. She looked dreamy and thoughtful. Perfect for what I wanted to do with these journal pages. I wanted to color her with darker colors to remind me of night. I used my Copics and added some fairy bling to her wings, wand and eyeshadow. I embossed my sentiments and dreamy swirls with white embossing powder so they would show in the midst of the kaleidoscope of color. I used Gelatos (paint in a chapstick tube - FABULOUS!) to scribble color onto my paper and then dipped my finger in water and smeared it. Serious fun! When I was done, I kept thinking of Joseph and the Technicolor Dream Coat LOL! For the finishing touch, I covered the pages with Iridescent Medium to give them pearly shine (so hard to see in the pictures, darn it).
![]() | |
A close up view of the fairy - and I LOVE that sentiment. |
Stuff I Used:
Stamps- Karber Stamps - 'Beautiful Fairy' Digi, Layers of Color - 'Joyful Noise' Stamps (large swirls & large butterfly), AMuse Studio Stamps - 'Ornate Elements' (smaller swirls), Marvelous Marigolds (small butterfly), Inkadinkado Stamps - Chelsea Alphabet (fly), Friendship (believe), The Rubber Cafe Stamps -'Vintage Treasures' (Do you ever sit and dream?), Stampin' Up Stamps - 'Bliss' (bird, small butterfly w/text)
Cardstock - AMuse Studio Sugar CS
Copics - Skin: E000, E00, E11, R20 / Hair: C1, C3, C5, C7 / Dress: BG01 bridged w/ BG05, BG07
Wings: RV10, R85, BG000, BG02 / Wand: 100, BG10
Faber Castell Gelatos - Every color in the rainbow and white
Nesties - Scalloped Ovals
Other Stuff - Versamark Ink, SU White Embossing Powder, Stardust Stickles, Iridescent Medium
Thanks for stopping by to take a peek! You make my day! :)
Subscribe to:
Posts (Atom)